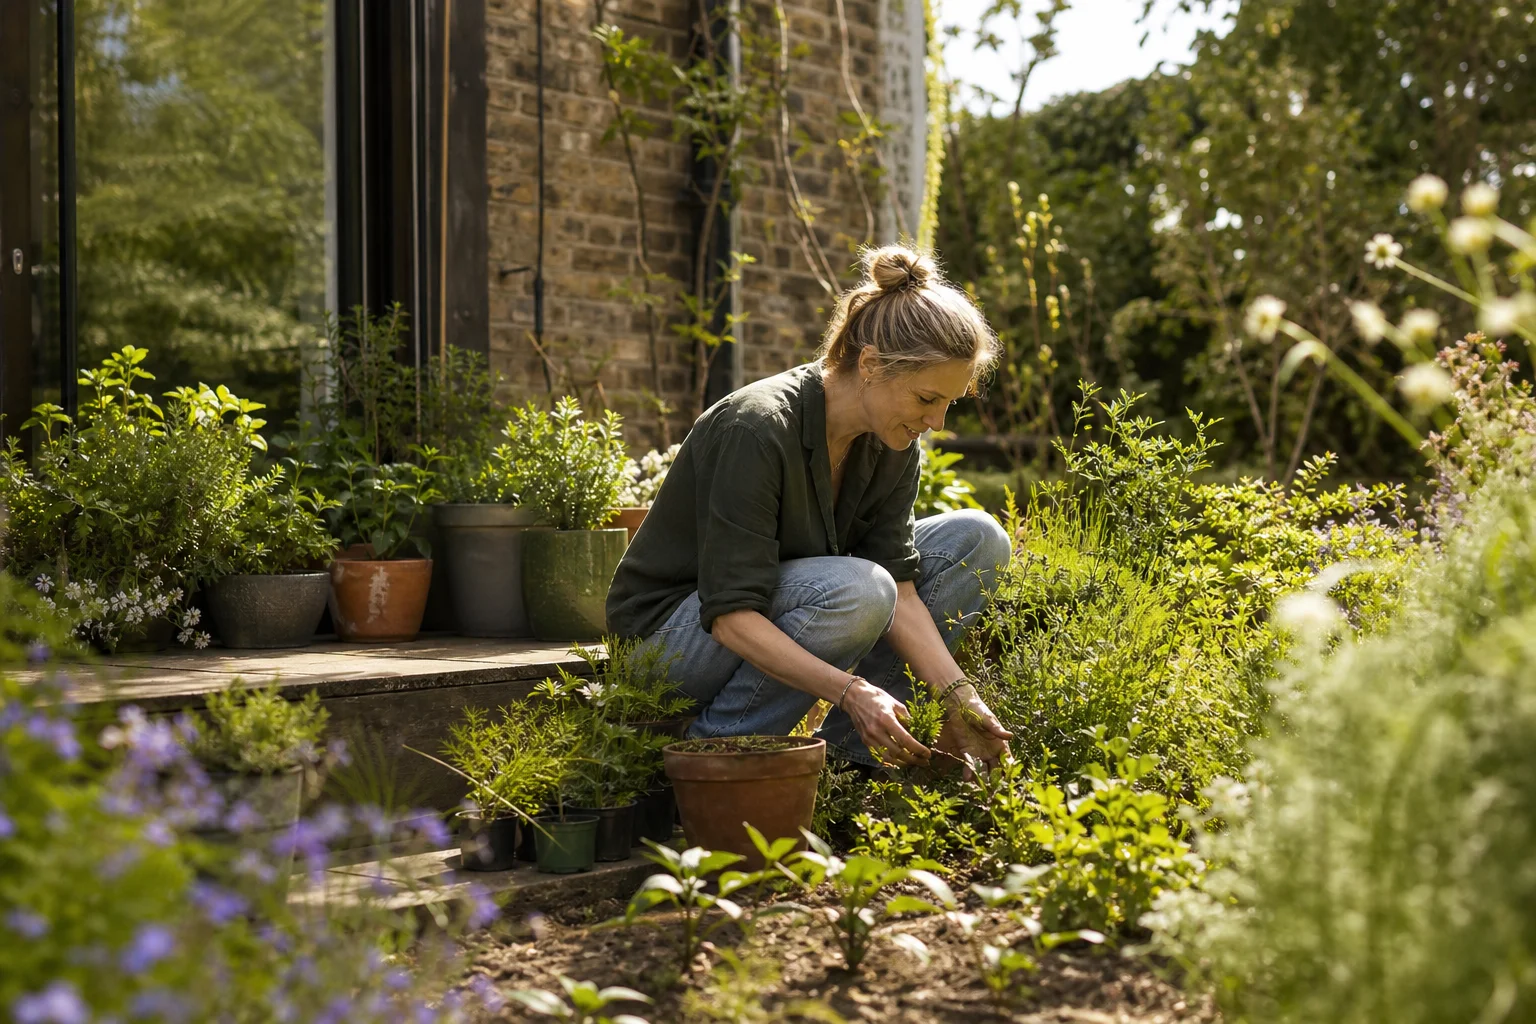
Botanical gardening at home means designing around living plants first: their shapes, textures, colors, habits, and needs. A strong plant-focused garden is more than a collection of favorites. It works because the plants suit the site, support the design, and can be maintained over time without turning every weekend into a rescue mission.
Read your site before choosing a single plant
One of the quickest ways to make gardening harder is to buy plants before you understand the place they will live in. A plant that thrives in dry sun may struggle in a damp, shaded side yard. A moisture-loving foliage plant may sulk in a hot bed beside a driveway.
Spend some time observing the garden before you shop. That early step narrows your choices and helps you design with the site instead of against it.
-
Track the light through the day.
Use direct-sun hours as a practical guide. Full sun usually means about 6 or more hours of direct sun per day. Part sun or part shade usually means about 3 to 6 hours of direct sun, with part shade often benefiting from protection during the hottest afternoon hours. Deep shade or full shade means little to no direct sun, or less than about 3 hours. Dappled shade under trees may shift through the season as leaves emerge or drop. -
Look for wind and exposure.
Open corners, balconies, and front yards can dry out quickly. Tender plants or large-leaved plants may need more shelter, while tougher grasses, shrubs, and drought-tolerant perennials may handle exposed spots better. -
Check how water moves.
After rain, see where water collects and where it drains away quickly. For a simple drainage check, dig a small test hole, fill it with water, and watch how long it takes to empty. If water sits for many hours or is still present the next day, drainage is likely slow. If the hole drains very quickly and the soil dries soon after rain, the site may be fast-draining. A low patch that stays damp can support different plants than a raised bed that dries out by afternoon. -
Feel the soil texture.
Sandy soil drains fast and often needs organic matter to hold moisture. Clay soil holds water longer and may need help with structure and drainage. Loamy soil is easier to work with, though it still needs care. -
Notice heat pockets.
Brick walls, concrete paths, gravel, and dark paving can reflect heat. These spots may suit sun-loving Mediterranean-style herbs or tough perennials, but they can be stressful for plants that prefer cool, even moisture.
Think of two common home garden examples. A sunny front bed near a walkway may be bright, warm, and quick to dry. A narrow side yard between houses may be shaded, protected, and slow to drain. Those two spaces should not share the same plant list, even if they belong to the same home.
Real story
I once bought six “full sun” plants because the tags looked cheerful and I was feeling optimistic in the nursery parking lot. Then I planted them along the side yard, where the afternoon shade turns the soil into a damp little disappointment. By the end of the week, I had a row of expensive green frowns and one very smug fern I didn’t even remember buying.
Have a story of your own? Share it in the comments below.
Decide what kind of botanical look you want the garden to have
Once you understand the site, decide what kind of plant-focused garden you want to create. This is where the design starts to feel deliberate. Without a clear direction, it is easy to end up with one of everything, which can look less like a garden and more like a plant sale that escaped.
Your garden’s style does not need a strict label, but it helps to choose a mood. You might want something lush and leafy, with bold foliage and layered greens. You might prefer a cottage-like garden with soft flowers, loose edges, and seasonal color. Or you may want a more structured design with clipped shapes, repeated shrubs, and a restrained palette.
Also decide what should carry the design. Some botanical gardens at home are built around foliage, using leaf size, shape, and color as the main feature. Others rely on flowers, fragrance, bark, grasses, seed heads, or strong seasonal change. Most successful gardens use a mix, but one or two priorities should lead.
A simple example is a green-and-white planting scheme. You might use evergreen shrubs for structure, white flowering perennials for brightness, and plants with silver or variegated leaves for texture. The palette is limited, but the garden can still feel rich because the leaves, heights, and forms vary.
Setting boundaries is not limiting. It makes the garden easier to read. If you love every color, every leaf shape, and every plant at the nursery, give yourself a rule or two before you buy. Future you, standing in the garden with a watering can, will be grateful.
Build a plant palette that gives the garden structure, color, and rhythm
A botanical garden works best when plants are chosen as a group. Instead of picking isolated favorites, build a plant palette with roles. Some plants provide the bones of the design. Others bring movement, flowers, texture, or seasonal interest.
Start with fewer types than you think you need. Repetition helps a garden feel calm and connected. You can still have variety, but repeated plants keep the design from feeling scattered.
-
Choose structural plants first.
These are the plants that hold the garden together. They may include small trees, shrubs, upright evergreens, ornamental grasses, or long-lived perennials with strong form. In many home gardens, these plants provide shape even when flowers are out of season.For example, three repeated shrubs along a border can create rhythm. A small tree near a seating area can give height and shade. A clipped evergreen at the corner of a path can act like a visual pause.
-
Add mid-level plants for body and transition.
These plants fill the space between the main structure and the front edge. They often provide color, texture, and seasonal change. This layer might include flowering perennials, grasses, ferns, compact shrubs, or foliage plants.A feathery perennial can soften the edge of a shrub. A clump-forming grass can add movement. A broad-leaved plant can make fine-textured plants look more delicate by contrast.
-
Use accents with restraint.
Accent plants are the ones that catch the eye: a spring-flowering bulb, a dramatic leaf, a bright bloom, or a plant with unusual form. They are useful, but too many accents compete with each other.A good rule is to repeat accents in small groups or place them where they have a reason to stand out. One striking plant near a path bend can feel deliberate. Ten unrelated “special” plants lined up together may feel restless.
-
Plan for more than one season.
A plant-focused garden should not depend on a single month of bloom. Look for plants that offer different kinds of interest through the year: spring flowers, summer foliage, autumn color, winter stems, evergreen leaves, or seed heads.For instance, a border might combine a repeat shrub, a long-blooming perennial, a grass that looks good in late season, and bulbs that appear before the main plants fill in. The garden changes, but it does not disappear between peak moments.
-
Check that the plants share similar needs.
A beautiful palette still has to survive together. Do not place a plant that wants dry, lean soil beside one that wants steady moisture and rich compost. They may look good on paper, but one of them will be quietly plotting its exit.
Before purchasing, add one more checkpoint: confirm that each plant suits your region. Check its USDA hardiness zone or local climate equivalent, heat and cold tolerance, expected mature size, and whether it is listed as invasive, restricted, or discouraged in your area. A plant can be attractive and still be a poor choice if it spreads aggressively or struggles in your local climate.
You can also add ecological value by choosing locally appropriate flowering plants, seed heads, sheltering grasses, and native or well-adapted species where they fit the site. The goal is not to force a wild planting style if that is not your design, but to make the garden more useful to pollinators and other wildlife when suitable.
Example plant palettes for common home conditions
Use these as starting points, not fixed shopping lists. Choose specific varieties that are hardy, locally appropriate, and not invasive or restricted where you live.
- Sunny, dry border: Try a structure of compact shrubs or small evergreens, then add drought-tolerant perennials and grasses. Possible examples include lavender or rosemary where hardy, yarrow, salvia, coneflower, stonecrop, little bluestem, blue fescue, or other locally adapted dry-site plants.
- Shaded, moist side yard: Build around foliage, texture, and soft seasonal flowers. Possible examples include ferns, hosta, astilbe, coral bells, foamflower, sedges, Japanese forest grass where suitable, or a shade-tolerant hydrangea in climates where it grows well.
- Small entry bed: Keep the palette simple and repeated so the entrance feels tidy. Possible examples include a compact evergreen shrub or small conifer for structure, coral bells or dwarf ornamental grasses for foliage, low groundcovers for the edge, and seasonal bulbs such as crocus or dwarf daffodils for early interest.
A simple plant palette might include a few repeat shrubs for structure, a soft grass or fern for texture, a flowering perennial for color, and a seasonal bulb for early interest. The exact plants will depend on your climate and site, but the roles stay the same.
Map the layout so the plants and paths work together
After choosing a plant palette, turn it into a layout. This is where you decide how people will move through or view the garden, where the eye should rest, and how the planting will sit in the space. Even a small garden benefits from a clear plan.
Begin with the main shapes before placing individual plants. Beds, paths, edges, seating areas, and focal points should come first. Plants then support the structure instead of trying to solve it afterward.
-
Mark the main viewing points.
Look from the places where you will see the garden most often. This may be a kitchen window, front step, patio chair, driveway, or gate. Design for those views first.If you see the garden every morning from a window, place a strong plant shape or seasonal feature where it can be enjoyed. A garden should work from inside the home too, not only when you are standing in the bed with muddy shoes.
-
Place paths and access routes.
Paths do not have to be formal, but you need a way to reach plants for watering, pruning, weeding, and cutting flowers if you grow them. Narrow beds can often be reached from the edge. Deeper beds may need stepping stones or a small path.A curved path can make a garden feel relaxed and encourage slower movement. A straight path can feel clean and ordered. Choose the shape that fits the garden’s mood and the practical route people will take.
-
Set focal points before filling the border.
A focal point might be a specimen shrub, a small tree, a large pot with living plants, a bench, or a strong evergreen form. It gives the eye somewhere to land.For example, a curved border might lead toward a small tree near a seating area. Around it, lower plants can frame the feature without hiding it.
-
Layer plants by height and habit.
In a border viewed from one side, taller plants usually sit toward the back, medium plants in the middle, and low plants or groundcovers at the front. In an island bed viewed from all sides, taller plants often sit near the center, with lower layers around them.Height is not the only factor. Think about plant shape too. Upright plants create rhythm. Mounded plants soften edges. Spreading plants can connect gaps. Airy plants can be placed where they will not block a view.
-
Leave room for mature growth.
Young plants can make a new garden look sparse at first. That is normal. Crowding them too closely may look full for one season, then become a maintenance problem.Use spacing guidance from plant labels or trusted local growing resources, and think about the plant’s mature width. If the garden looks bare early on, use mulch, temporary annuals, or small seasonal plants while the main planting grows in.
A good layout balances beauty and access. You want the garden to look layered and abundant, but you also need to reach the back of the bed without performing a careful dance over your favorite groundcover.
If you do not have in-ground beds, use the same process for containers, balconies, patios, or courtyards. Treat each pot or group of pots as a small planting zone. Choose containers with drainage holes, use potting mix rather than garden soil, match pot size to the mature size of the plants, and group plants with similar water needs. Containers dry out and heat up faster than garden beds, so expect more frequent watering and check hardiness carefully for exposed pots.
Match each planting area to the soil, water, and maintenance it can handle
Now connect the design to the care it will need. A plant-focused garden should make maintenance easier by grouping plants with similar needs. This is one of the most practical decisions you can make.
Do not assume the whole garden has the same soil or moisture level. A dry-sun border near paving may need plants that tolerate heat and fast drainage. A shaded bed near a downspout may suit ferns, woodland perennials, or other foliage plants that prefer more consistent moisture.
Amend soil where it helps, not as a reflex. Many gardens benefit from compost worked into planting areas, especially where soil is compacted or low in organic matter. But drainage problems may need a different solution, such as raising the bed, loosening compacted soil, or choosing plants that tolerate heavier conditions.
Group plants by water needs. Drought-tolerant perennials, sun-loving herbs, and dryland grasses can share one area. Moisture-loving foliage plants can have another. This keeps irrigation simple and avoids the common problem of overwatering one plant while trying to save its thirsty neighbor.
Mulch also matters. Organic mulch helps conserve moisture, reduce weeds, and moderate soil temperature. Keep it pulled back slightly from plant crowns and woody stems so moisture does not sit directly against them. Edging can help keep beds neat, especially where planting meets lawn, gravel, or paths.
Irrigation should follow the layout, not the other way around. A small garden may only need careful hand watering while plants establish. Larger beds may benefit from drip irrigation or soaker hoses placed around the plant groupings. The aim is steady, appropriate moisture at the root zone, not a daily sprinkle that wets leaves and barely reaches the soil.
A practical example is to treat a garden as several planting zones. One sunny, dry area could hold drought-tolerant perennials and compact shrubs. A nearby shaded bed could focus on moisture-loving foliage plants with broad leaves, ferns, and soft groundcovers. Both areas can feel connected through repeated colors or textures, even though the care needs differ.
Plant in layers, then shape the garden as it matures
Planting day is not the end of the design. It is the beginning of the garden’s living phase. Plants grow, lean, spread, bloom heavily, rest, surprise you, and occasionally ignore the plan with impressive confidence.
Before you dig for beds, shrubs, trees, paths, edging, or irrigation, check for underground utilities, irrigation lines, drainage pipes, landscape lighting cables, and any local digging requirements. If your area has a utility-marking process, use it before excavating. It is much easier to adjust a layout than to repair a damaged line.
Install the garden in a way that protects the layout you worked to create. Then expect to adjust it as the planting matures.
-
Set out all plants before digging.
Place pots on the soil where you think they should go. Step back and look from the main viewing points. This helps you catch spacing problems, awkward gaps, or repeated plants that are not actually repeating in a useful way.Move pots around until the rhythm feels right. It is much easier to shift a container than to dig up a newly planted shrub.
-
Plant the structural layer first.
Trees, shrubs, and large perennials should go in before smaller plants. These set the framework and make it easier to place the supporting layers around them.Check mature height and spread again before planting. Give large plants enough room to become what you chose them to be.
-
Add mid-level plants in groups.
Planting in small groups often looks more natural and more intentional than scattering single plants everywhere. Groups of three or five can work well for many perennials, depending on the size of the space and the plant’s mature spread.Repeat a few plants along the border to create rhythm. The garden will feel more settled when the eye recognizes shapes and textures as they appear again.
-
Finish with edges, groundcovers, and seasonal accents.
Low plants soften the front of a bed and help connect the garden to paths or lawn. Groundcovers can reduce bare soil over time, though they still need weeding while they establish.Seasonal accents, such as bulbs or short-lived flowering plants, can fill temporary gaps. Use them to support the design rather than distract from it.
-
Water deeply during establishment.
New plants need consistent attention while their roots settle into the soil. Watering deeply encourages roots to grow down rather than staying near the surface.The exact schedule depends on weather, soil, plant type, and season. Check the soil with your finger or a small trowel instead of watering only by habit.
-
Edit the garden after one growing season.
Watch what thrives, what struggles, and what grows larger than expected. Some plants may need moving. Others may need dividing, pruning, or replacing with a better match.For example, a border may look too heavy on one side once summer growth fills in. You might move a repeated perennial to improve balance, replace a weak plant with one better suited to the site, or reduce overcrowding before it becomes a bigger problem.
-
Keep notes on seasonal gaps.
Notice when the garden looks strong and when it looks thin. You may find that spring is full of interest but late summer needs more texture, or that winter needs stronger evergreen structure.Notes do not need to be formal. A few photos taken from the same spot each month can show patterns you may miss day to day.
A botanical garden at home becomes better through observation. The first plan gives it direction, but the best refinements come from seeing how plants behave in your actual soil, light, and weather.
Quick botanical garden design checklist
Use this compact worksheet to turn the idea into a plan:
- Measure the site and sketch the basic shape.
- Record light levels using direct-sun hours.
- Note soil texture, moisture, drainage, wind, and heat pockets.
- Choose the garden style or mood you want.
- Build a plant palette with structure, mid-level plants, accents, and seasonal interest.
- Check hardiness, local climate suitability, mature size, care needs, and invasive status before buying.
- Sketch beds, paths, viewing points, focal points, and access routes.
- Group plants by similar water, soil, and maintenance needs.
- Check utilities and local digging requirements before excavating.
- Plant in layers, starting with structural plants.
- Water carefully during establishment.
- Review the garden after one growing season and adjust what is not working.
Let the garden stay alive in the design
A plant-focused garden is never completely fixed, and that is part of its appeal. The goal is not to freeze the space into a perfect drawing. The goal is to create a clear structure where living plants can grow well and still look intentional.
Read the site first, choose a visual direction, build a coordinated plant palette, map the layout, and match each area to the care it can realistically receive. Then plant in layers and keep adjusting as the garden matures. With that approach, botanical gardening becomes less about collecting plants and more about building a healthy, beautiful landscape that belongs where it is.