Smart security cameras work best when each one has a clear role: watching the front door, covering a driveway, checking a side gate, or keeping an eye on deliveries. This guide covers the practical decisions that matter before and after you buy, so you end up with a secure, useful system instead of a set of cameras that sends alerts every time a squirrel passes by.
Start with the parts of your home you actually need to watch
Focus first on the places where activity matters most. For many homes, that means doors, the driveway, the garage, side paths, gates, and any spot where packages are left. A camera aimed at a blank wall or a rarely used corner usually adds little value, even if it looked impressive in the product photos.
It helps to separate three common goals:
- Deterrence: You want the camera to be visible enough that someone notices it before approaching. A front porch camera with a small status light or an outdoor camera near a side gate can help here.
- Identification: You want a clear view of faces, clothing, vehicles, or direction of travel. This depends heavily on placement, lighting, and camera angle.
- Package monitoring: You want to see when a delivery arrives, who approaches the porch, and whether a package is still there.
A small house may only need a doorbell camera and one outdoor camera aimed at the driveway or side entrance. A home with a detached garage, side access, or a long driveway may need more coverage, but that does not mean every wall needs a camera. The goal is useful coverage, not a miniature airport security setup for the house.
Indoor cameras are optional for many households. Some people use one in an entryway, basement, garage interior, or pet area. Others avoid indoor cameras for privacy reasons and rely only on outdoor coverage. There is no single right answer; it depends on what you want to monitor and what your household is comfortable with.
Real story
I once mounted a camera to “cover the front entry” and spent twenty minutes admiring the app before realizing it was perfectly framed on my own driveway, where absolutely nothing happened except me walking to the mailbox in gym shorts. The only alert I got all day was a squirrel doing parkour across the hood of my car. I felt very secure and mildly judged.
Have a story of your own? Share it in the comments below.
Use a pre-buy checklist before comparing models
Before you get drawn into camera specs, make a short comparison list for each location you want to cover:
- Location: Front door, driveway, side gate, garage, backyard, indoor entry, or another specific area
- Camera type: Doorbell, outdoor battery, outdoor plug-in, floodlight, indoor, or wired camera
- Power source: Battery, solar accessory if supported, plug-in outlet, existing doorbell wiring, or hardwired exterior power
- Storage method: Local storage, cloud storage, or a hybrid setup
- Subscription cost: Which features, clip history, and number of cameras are included with or without a paid plan
- Wi‑Fi coverage: Whether the actual mounting spot has reliable coverage for the camera, not just for your phone
- Smart-home compatibility: Whether the exact model works with the app, display, speaker, or automation system you plan to use
- Privacy and access controls: Separate user accounts, two-factor authentication, privacy zones if supported, audio controls, and shared access settings
This checklist keeps the purchase tied to real use. A camera that works well for a wired front porch may be a poor match for a side gate with no outlet and weak Wi‑Fi.
Example system: small townhouse
For a small townhouse with a front entrance, a short driveway, and a side gate, a simple system might look like this:
- Front door: A doorbell camera aimed to capture visitors’ faces and package drops. It could use existing doorbell wiring if available, or a battery model if wiring is not practical.
- Driveway or parking area: One outdoor plug-in or floodlight camera mounted near the garage or porch, chosen only if safe outdoor-rated power is available. This camera would focus on night visibility and vehicle or person alerts.
- Side gate: One outdoor battery camera, especially if there is no nearby outlet. Motion-only recording may be enough if the goal is simply to know when someone enters the side path.
- Storage decision: Cloud storage may be useful for the front door where delivery history matters, while the side gate camera may be fine with local or shorter motion-clip storage if the model supports it.
- Privacy decision: No indoor cameras unless the household has a specific need, such as checking a garage interior or pet area.
The exact products matter less than matching each camera to its job, power source, network connection, and privacy expectations.
Choose camera types, power options, and features that fit each location
Once you know what each camera needs to do, choose the type and power source for that spot. A camera by the front door has different needs than one watching a fence line. Power access, weather exposure, Wi‑Fi strength, and nighttime visibility matter more than the longest feature list.
| Camera or setup type | Best fit | Power considerations | Features to look for |
|---|---|---|---|
| Doorbell camera | Front entrance, deliveries, visitors | Usually wired to existing doorbell wiring or battery-powered | Two-way audio, package detection, good close-range view, night vision |
| Outdoor battery camera | Fence line, side yard, shed, area without an outlet | Needs recharging or a solar accessory if supported | Weather resistance, adjustable motion zones, strong battery settings |
| Outdoor plug-in camera | Porch, garage exterior, covered patio | Needs a safe outdoor-rated outlet and cable path | Continuous power, reliable alerts, good night performance |
| Floodlight or spotlight camera | Driveway, garage, dark side yard | Usually wired or connected to existing exterior power | Built-in light, person detection, wide field of view |
| Indoor camera | Entryway, garage interior, pet area | Usually plug-in | Privacy shutter or off mode, two-way audio, clear app controls |
| Wired home camera | Permanent exterior coverage | Requires more installation planning | Stable power, possible continuous recording, fewer battery limits |
Use safe outdoor power and weatherproofing
Outdoor cameras need more than a nearby plug. Use outdoor-rated cameras, cables, plugs, adapters, and accessories, and keep cable seals and charging-port covers closed as directed by the manufacturer.
For plug-in outdoor cameras, use a code-compliant outdoor power setup, such as a suitable weather-resistant outlet with a weatherproof in-use cover where required. Avoid indoor extension cords outdoors, and do not run cords where doors, windows, garage doors, or foot traffic can pinch them. Keep connectors out of standing water and route cables so water does not run directly into ports.
For wired cameras, floodlight cameras, or any camera connected to exterior electrical wiring, follow the manufacturer’s instructions and local electrical requirements. Hardwired fixtures generally need proper weatherproof boxes, secure mounting, safe grounding where applicable, and GFCI or other protection when required. If you are not comfortable with electrical work, or if the installation involves replacing or adding an exterior fixture, use a qualified electrician.
Match features to the job
A wider field of view can help cover a porch or driveway, but wider is not always better. Very wide views can make faces and details appear smaller. For identification, camera angle and distance often matter as much as resolution.
Night vision is essential for outdoor cameras. Some cameras use infrared night vision, while others use a visible spotlight for color footage. A spotlight can help in a driveway or side yard, but it may be annoying near bedrooms or close neighbors.
Two-way audio is useful at the front door, especially for deliveries. It is less important for a camera watching a side fence. Motion detection matters everywhere, but the quality of detection varies by camera and subscription plan, so check which features are included before buying.
Also check compatibility before you commit. Make sure the camera works with your phone, Wi‑Fi network, and any smart-home app or display you want to use. Camera support across smart-home platforms can vary by model, so verify the exact product rather than assuming the whole brand line behaves the same way.
Decide how the system will store footage and protect household privacy
Storage is one of the most important buying decisions because it affects cost, convenience, and control. Some cameras store video locally on a memory card, hub, or home device. Others rely mainly on cloud storage. Some offer both.
Local storage can be appealing if you want to avoid monthly fees or keep footage inside your home network. It may also suit people who do not need advanced remote access. The tradeoff is that local storage can be more limited if the device is damaged, stolen, or not backed up.
Cloud storage is usually easier for remote viewing, clip history, and sharing footage with household members. It often comes with subscription costs, and the details can change by plan. Before buying, check the official terms for clip length, retention period, number of cameras included, and which detection features require a paid plan.
Hybrid setups can be a practical middle ground. For example, a homeowner might use local storage for routine motion clips and cloud storage for a front door camera where delivery history matters most. Another household may prefer a cloud plan because several family members need easy access when away from home.
Motion clips or continuous recording
Many smart cameras record only when they detect motion. This saves storage and battery life, but it may miss the moments before or after an event. Continuous recording can provide more context, but it usually requires constant power, more storage, and sometimes a paid plan.
For a battery camera on a side gate, motion-only clips may be enough. For a driveway camera where you want to see the full sequence of a vehicle arriving and leaving, continuous recording may be more useful if the camera supports it.
Set privacy rules early
Privacy settings should not be an afterthought. Decide who can view live video, who can review recordings, and who can change settings. Use separate user accounts when possible instead of sharing one password across the household.
Look for these controls in the app:
- Shared access for family members
- Guest permissions with limited control
- Camera on/off schedules
- Privacy zones, on supported cameras; verify whether they mask live view, recordings, alerts, and shared or cloud access
- Audio recording settings
- Status lights or indicators
- Two-factor authentication for account sign-in
Be thoughtful about where cameras point. Avoid aiming them into neighbors’ windows, private yards, or areas where people reasonably expect privacy. For indoor cameras, tell household members and regular visitors where cameras are located. Clear communication now avoids awkward conversations later, which is useful because “surprise, there’s a camera” is rarely a welcome sentence.
Map camera placement before drilling or mounting anything
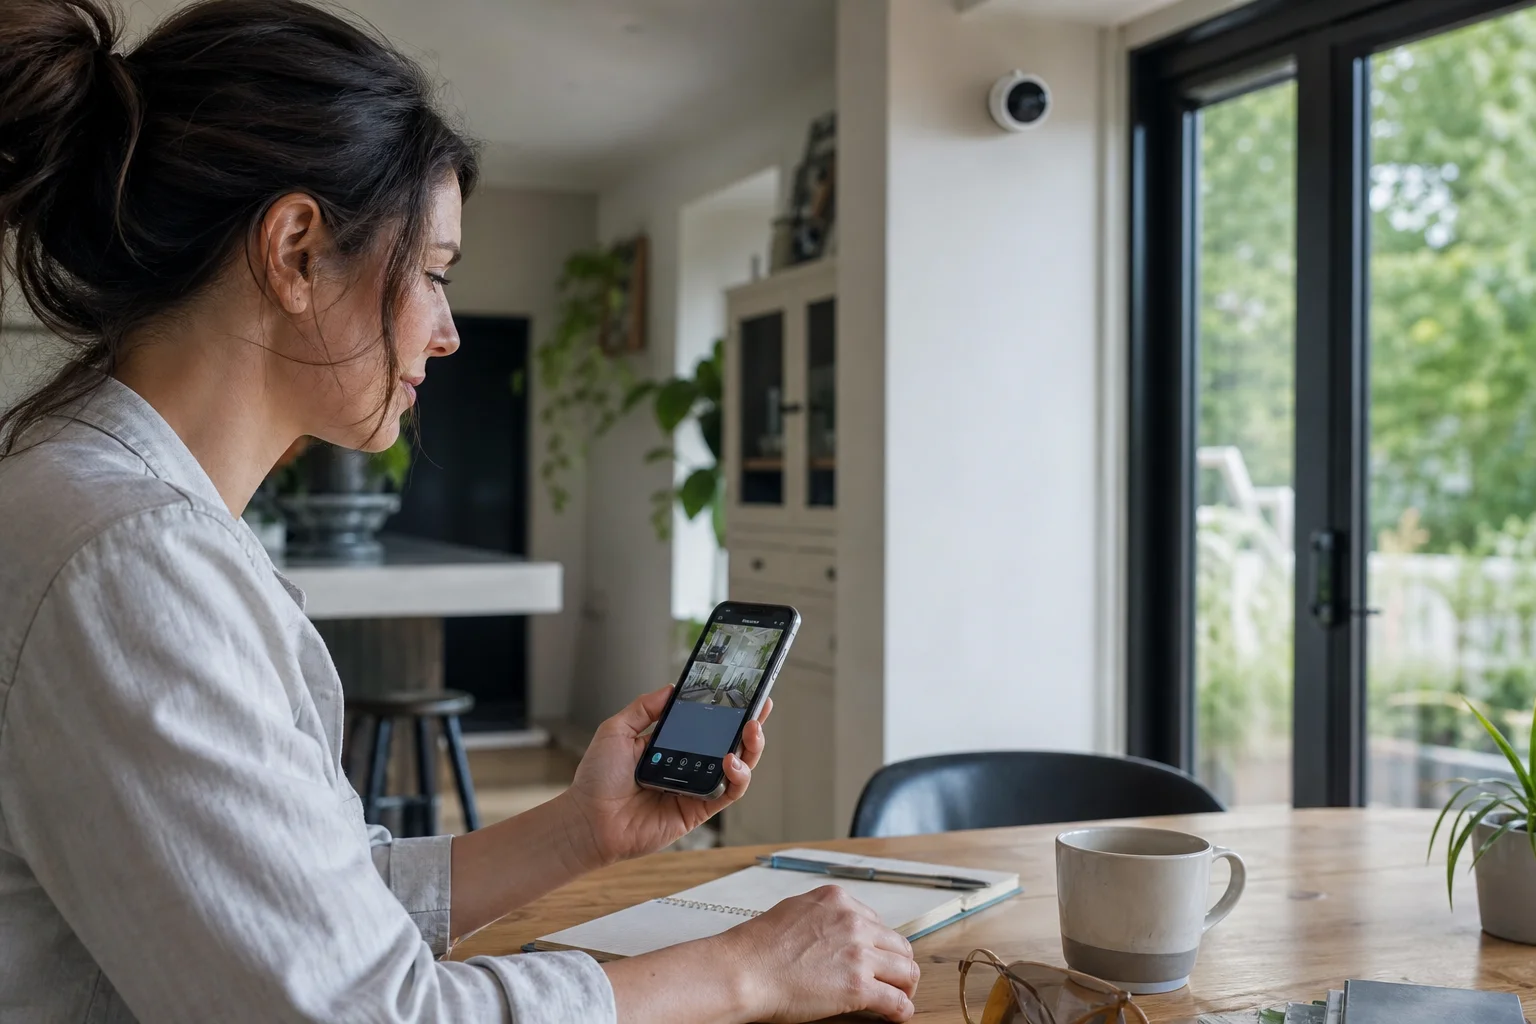
Do a placement test before making holes. Hold the camera where you plan to mount it, view the live feed in the app, and check what the camera actually sees. Product photos cannot tell you whether your porch light causes glare or whether a tree branch will trigger alerts every windy afternoon.
-
Start at the main entrance.
Place a doorbell or porch camera where it can capture visitors’ faces and package drops. Avoid aiming only at the top of people’s heads. A slight angle toward the approach path often gives better context than a straight-on view of the door. -
Check the driveway and garage approach.
A camera near a garage corner may cover both the driveway and a side path. Make sure vehicles do not block the main view. If headlights cause glare at night, adjust the angle before mounting. -
Cover side gates and less visible paths.
Side yards are easy to overlook. A battery camera can work well here if power is not nearby, but confirm the camera’s actual Wi‑Fi connection at the mounting spot before relying on it. -
Think about camera height.
Cameras should be high enough to reduce tampering but low enough to capture useful detail. Many home cameras work best around first-floor eave or doorway height, depending on the layout. If the view is too high, you may see heads and hats instead of faces. -
Use crossing angles where possible.
At entrances and paths, an angled view can show where someone came from and where they went. A straight-on view may catch a face, but it can miss the surrounding activity. -
Watch for false-alert sources.
Streets, sidewalks, trees, flags, pets, and reflective surfaces can all trigger motion alerts. If the camera sees half the neighborhood road, your phone may start reporting every passing car like it has breaking news. -
Check day and night views.
Test the feed in bright sun, evening light, and darkness. Porch lights, shiny siding, rain, and direct sun can change the image more than expected. -
Respect boundaries.
Use privacy zones if your camera supports them, or adjust the angle if the camera captures neighboring private areas. The best setup protects your home without creating unnecessary privacy issues for others.
Install the hardware, connect it to Wi‑Fi, and link it to your smart-home app
After you have tested placement, install one camera at a time. That makes troubleshooting easier. If you mount five cameras and then discover the garage signal is weak, you have created a small weekend project with a ladder.
-
Charge, power, or wire the camera first.
Fully charge battery cameras before mounting. For wired devices, turn off power where required and follow the manufacturer’s instructions. If electrical work is beyond your comfort level, hire a qualified electrician. -
Confirm Wi‑Fi with the actual camera before drilling.
A phone signal check at the mounting spot is only a preliminary screen because a phone and camera may use different Wi‑Fi bands or have different radio strength. Temporarily power and pair the actual camera at the exact mounting spot, confirm the camera supports the Wi‑Fi band available there, and check the app’s signal or connection-quality reading before drilling. For detached garages or long driveways, a mesh Wi‑Fi node or outdoor-rated networking option may help. -
Mount the bracket securely.
Use hardware suited to the surface, such as wood, masonry, or siding. Outdoor cameras should be mounted so water does not pool around the cable or charging port. -
Attach the camera and check the live view.
Before tightening everything fully, open the app and confirm the framing. Small angle changes can make a big difference. -
Pair the camera with the manufacturer app.
Follow the setup prompts and give the camera a clear name. “Front Door,” “Driveway,” and “Garage Side” are more useful than “Camera 3.” -
Update firmware during setup.
Firmware updates often improve stability, compatibility, and security. Do this before you fine-tune settings, since updates can sometimes reset or change options. -
Set time zone, location, and permissions.
Correct time settings make recorded clips easier to review. Review app permissions as well, especially location, microphone, notifications, and shared access. -
Link to your smart-home app if needed.
If you use a broader smart-home platform, add the camera there after it works in the manufacturer app. For example, a doorbell camera may trigger porch lights when motion is detected, if both devices and apps support that automation. -
Test live view away from home.
Turn off your phone’s Wi‑Fi and use cellular data to confirm remote access works. This is a simple way to catch account or network issues early. -
Label cables and note charging needs.
For plug-in and wired cameras, tidy the cable path. For battery cameras, note how they recharge and whether they are easy to reach without moving half the garage.
Fine-tune motion zones, alerts, and test runs after installation
The first few days are for tuning. Most cameras are too chatty out of the box because they do not know the difference between a person at your porch and a delivery truck passing on the street. Good settings make the system more useful and less annoying.
-
Create motion zones.
Limit detection to areas that matter, such as the porch steps, driveway, gate, or garage approach. Exclude sidewalks, roads, and neighboring areas where possible. -
Set detection types.
If the camera supports person, package, vehicle, or animal detection, choose what matters for that location. A front door camera may need people and packages. A driveway camera may need people and vehicles. A side yard camera may only need people. -
Adjust sensitivity slowly.
Start with a moderate setting. If you miss important events, increase sensitivity. If you get constant alerts from trees or traffic, reduce it or tighten the motion zone. -
Control notification frequency.
Some apps can group alerts or pause repeat notifications for a short period. This is useful for busy areas, such as a driveway during school pickup or a porch during a family gathering. -
Test common scenarios.
Walk up to the front door, place a package, pull into the driveway, open the side gate, and move through any area you expect the camera to cover. Review the clips afterward. -
Test at night.
Night performance can reveal problems that daytime testing misses. Look for glare, washed-out faces, dark corners, and motion that starts recording too late. -
Review recordings after several days.
Do not judge the setup from one afternoon. Weather, sunlight, traffic, and household routines change. Make small adjustments based on real use. -
Revisit privacy and access settings.
Confirm that only the right people can view cameras and recordings. Remove old guest access when it is no longer needed.
Keep the system useful over time
A smart camera system is not something you set once and forget forever. Batteries need charging, subscriptions may change, apps get updates, and your home routines can shift. Review the system every few months to make sure it still matches how you live.
A simple maintenance cadence helps:
Monthly
- Check battery levels and recharge or swap batteries before they get low.
- Wipe lenses and light covers with a suitable soft cloth if footage looks hazy, spotted, or washed out.
- Confirm camera angles have not shifted after wind, storms, cleaning, or accidental bumps.
- Review recent alerts and tighten motion zones if the system has become too noisy.
- Test at least one live view and one recent recording so you know the system is still capturing what matters.
Quarterly
- Check for firmware and app updates, especially for security and stability fixes.
- Review shared users, guest access, and account permissions; remove anyone who no longer needs access.
- Confirm two-factor authentication and account recovery settings are still current.
- Review subscription and storage settings, including clip history, retention, camera limits, and features that may require a paid plan.
- Recheck Wi‑Fi quality for cameras that have become slow, unreliable, or delayed.
- Update camera names or notification settings if your household routines have changed.
If alerts become annoying, tune the zones instead of ignoring them. A good home camera setup should quietly support daily life, not become another demanding device that treats every leaf as an emergency.