A rafting trip is easiest to enjoy when the river suits your group, the conditions make sense, and everyone knows what to expect before the boat leaves shore. This guide covers the main choices that shape a safe, memorable day on the water, and many of the same habits apply to safe, memorable trips in nature, especially for first-time rafters who want excitement without feeling overwhelmed.
1. Match the rafting route to your experience, age, and comfort level
Start with the right kind of trip, not the most dramatic one. Rafting might mean a quiet scenic float, a lively beginner whitewater run, or a technical route with strong rapids and fast commands. Those are very different days on the water.
Most rafting routes are described by rapid class. In general, Class I and II water is calmer and better for beginners. Class III brings more waves, more maneuvering, and more teamwork. Class IV and above is more intense and usually better suited to people with previous experience, solid swimming comfort, and a real appetite for active paddling.
Trip length matters too. A half-day beginner run can feel exciting without leaving everyone worn out. A full-day trip may involve longer paddling, colder water exposure, lunch logistics, and more fatigue by the end. For families, nervous first-timers, or mixed-age groups, shorter and gentler is often the better choice.
Think honestly about the people in your group:
- Are there children or older adults coming?
- Is anyone nervous around moving water?
- Can everyone follow quick instructions?
- Is everyone comfortable wearing a life jacket and getting wet?
- Does anyone have a medical condition that should be discussed before booking?
A family with young kids may have a much better time on a gentle half-day float with mountain views than on a full-day whitewater route. A group of adults trying rafting for the first time may enjoy Class I-II or an easy Class III section, depending on comfort level and the guidance available.
For example, a family half-day plan might focus on a Class I-II scenic float in warm-season conditions, with secure water shoes, sun protection, snacks afterward, and a guide-managed shuttle. A first-time adult whitewater plan might choose a shorter Class II-III guided run, helmets if required, cold-water layers if recommended, and extra time for a full safety briefing before launch.
The point is not to “prove” anything to the river. The river is not keeping score, which is fortunate for everyone involved. Choose a trip that gives the group enough room to relax and enjoy the scenery, the splashes, and the shared effort.
Real story
I once showed up for a “relaxed” rafting trip wearing brand-new water shoes and the overconfidence of a man who had read exactly one blog post. The guide looked at our group, pointed to the rapids, and said, “If you’ve never done this before, keep your feet up and listen closely,” which is how I ended up white-knuckling the rope while trying to pretend my sunglasses weren’t already gone. By the time we hit shore, I had lost the glasses, gained a bruised ego, and discovered that “beginner-friendly” is a phrase that deserves follow-up questions.
Have a story of your own? Share it in the comments below.
2. Check river conditions, season, and water level before you commit
A rafting route does not stay exactly the same from one day to the next. Water level, recent rain, snowmelt, temperature, and season can all change how fast, cold, pushy, or forgiving a river feels.
Spring trips often bring higher flows in areas fed by snowmelt or seasonal rain. That can mean faster current, colder water, and a more powerful ride. Summer trips may bring warmer weather and lower flows, which can make some rivers feel more relaxed. Shoulder-season trips can be beautiful, but they may also come with colder air, quieter river corridors, and a greater need for proper insulation.
Even the same named route can feel very different depending on flow. A section that is mellow at moderate water may become faster and more technical after heavy rain. Another river may get rockier and slower at low water, with more bumps, shallow channels, or stuck rafts.
Before booking, ask the outfitter or local river authority about current conditions. If you are planning a private trip, check official river gauges, weather forecasts, access rules, and local advisories. Useful official resources to look up include USGS river gauges, National Weather Service forecasts and warnings, and the relevant park, forest, or land-management office for access, permits, closures, and local restrictions. Do not rely only on photos from a sunny day last season.
Key conditions to understand include:
- Water level: Higher flows can increase speed and power. Very low flows can expose rocks and change routes.
- Water temperature: Cold water affects comfort and safety, even on a warm day.
- Recent rain: Rain can raise levels quickly on some rivers and affect clarity or debris.
- Air temperature: A breezy, cloudy day can feel cold once you are wet.
- Storm risk: Lightning, flash flooding, and sudden weather shifts are serious river concerns.
Make weather decisions before you are forced into a bad one. Delay, reroute, or cancel if thunderstorms, flash-flood warnings, or unsafe storm conditions are forecast for the river corridor or upstream drainage. If thunder is heard while you are on the water, get off the river as soon as it is safe to do so, move away from exposed water and isolated trees, and seek substantial shelter or follow your guide’s emergency instructions. Avoid narrow canyons, steep drainages, and flood-prone channels when storm risk is present, even if the sky above you looks calm.
If a trip is delayed or rerouted because of water levels or weather, take that seriously. It may be disappointing, but it usually means someone is paying attention. A good rafting memory should involve wet shoes and laughter, not wondering why everyone ignored the forecast.
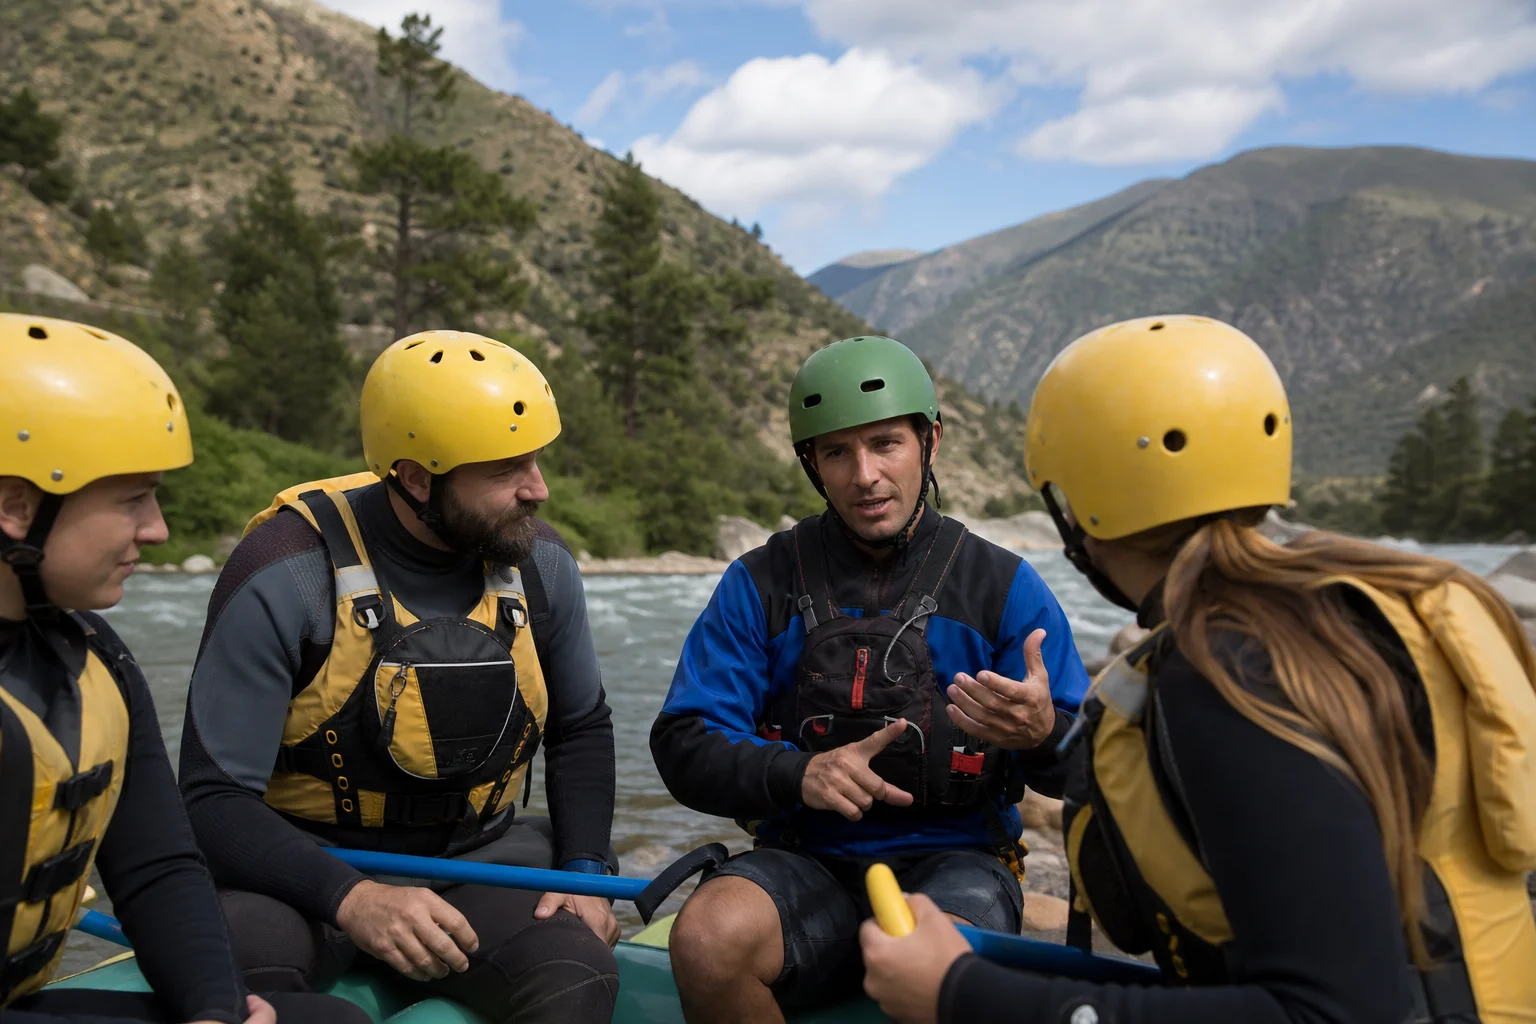
3. Verify the safety setup, guide standards, and briefing you should expect
A well-run rafting trip should have clear safety systems in place before anyone gets in the boat. This is not just about having gear. It is about properly fitted gear, trained leadership, legal access where required, and a group that understands basic river behavior.
At minimum, expect a properly fitted personal flotation device, often called a PFD or life jacket. On whitewater or technical routes, helmets are commonly required. Depending on the water and season, you may also need wetsuits, splash jackets, fleece layers, or other cold-water protection.
Your guide or trip leader should explain how the day will work before launch. A useful safety briefing is practical and specific. It should cover what to do, what not to do, and what commands you are likely to hear on the river.
A good pre-trip briefing should include:
- How to sit in the raft and brace your feet
- How to hold the paddle safely
- Basic paddle commands, such as forward, back, stop, and high-side
- What to do if you fall out of the raft
- How to float in moving water if you swim
- How to respond if another person falls in
- When to listen quietly and act fast
- How the group will handle rapids, calm stretches, and takeout
First-time rafters often worry about falling in. It can happen, even on managed trips. The important part is knowing what to do if it does. Guides usually explain how to keep your feet up, face downstream in moving water, hold onto your paddle if possible, and look for rescue instructions. Keep your feet up and do not try to stand in moving current until the water is shallow and calm or a guide tells you to stand; feet can become trapped between rocks or other obstacles. Follow the exact guidance given for that river, because local hazards matter.
You should also expect some basic screening. Operators may ask about age, weight range for gear fit, swimming comfort, pregnancy, injuries, medical conditions, or other factors that affect participation. These questions are not there to spoil the mood. They help match people to the right trip and equipment.
If you are unsure about a route or outfitter, ask direct questions before booking:
- Is this trip suitable for first-time rafters under current conditions?
- What rapid classes are expected under current flows?
- Are helmets required, and what cold-water gear is provided or recommended?
- Is the operator permitted, licensed, or otherwise authorized to run this section where such authorization is required?
- What training, river experience, first aid preparation, and rescue preparation do guides have?
- How many guides or safety staff are typically on the trip?
- What emergency communication and evacuation procedures are in place if someone is injured or the river becomes unsafe?
- How are changing flows, storms, smoke, closures, or other unsafe conditions handled before launch?
- What happens if the trip is canceled, delayed, rerouted, or moved to a different section?
- What experience do guides have on this specific river?
For private rafting trips, the safety bar is higher because there may not be a commercial guide managing the boat. A raft is not the place to figure it out as you go, especially when the river is already doing plenty of figuring on its own.
Before a private trip, treat these as minimum planning checks:
- Skills: At least one person should have appropriate experience for the river class, current flow, route-finding demands, and rescue needs. Everyone should understand basic paddle commands, swimming position, and how to respond if someone falls out.
- Permits and access: Confirm required permits, launch rules, parking rules, takeout access, seasonal closures, group-size limits, and any land-management restrictions.
- Flow and weather: Check current river gauges, recent trends, water temperature when available, National Weather Service forecasts and warnings, and local advisories before leaving and again before launch.
- Float plan: Leave a written plan with someone onshore, including the river section, launch and takeout points, vehicle details, group names, expected return time, and who to contact if you are overdue.
- Rescue and first aid gear: Carry properly fitted PFDs for everyone, helmets where appropriate, a first aid kit, throw bags or other rescue gear suitable for the trip, and enough people who know how to use them.
- Boat and repair gear: Bring equipment appropriate to the craft and river, which may include a repair kit, spare paddle, pump for inflatable craft, straps, and secure dry storage.
- Communication and evacuation: Know where cell service is unreliable, identify possible road access or exit points, and carry a communication method appropriate to the remoteness of the run.
- No-go conditions: Do not launch if flows exceed the group’s ability, required gear is missing, legal access or permits are uncertain, daylight is insufficient, thunderstorms or flash-flood risk are present, cold-water protection is inadequate, or anyone essential to the trip is not fit to participate.
4. Pack clothing and gear that keep you warm, protected, and able to paddle
What you wear on a rafting trip should help you move, stay warm enough, and stay safe if you get wet. Assume you will get splashed. On many whitewater trips, assume you may get soaked. Dressing as if you are only watching water from a safe distance is a quick way to end up shivering.
Choose quick-drying clothing over cotton. Cotton holds water and can make you cold once the wind picks up. Synthetic or wool layers usually work better. On warm-weather beginner trips, this may mean swimwear under shorts and a lightweight synthetic shirt. On cold-water trips, it may mean fleece, wetsuit layers, splash gear, or a drysuit, depending on conditions and outfitter guidance.
Footwear matters more than people expect. Flip-flops are easy to lose and offer little protection. Wear secure sandals with heel straps, river shoes, water shoes, or old sneakers that can get wet. Your shoes should stay on if you swim and protect your feet at launch, takeout, and rocky river edges.
Bring sun protection that works around water. Reflection off the river can increase exposure, and hats or sunglasses can disappear quickly if they are not secured. Use sunscreen, consider a brimmed hat for calm sections, and use a retainer strap for glasses or sunglasses.
Useful rafting-specific items include:
- Quick-drying shirt and shorts or leggings
- Secure water-friendly shoes
- Warm layer for before or after the trip
- Change of dry clothes for the drive back
- Towel
- Sunscreen and lip balm
- Sunglasses with a retainer strap
- Medication you may need soon after the trip
- Waterproof phone pouch or dry storage, if allowed
- Plastic bag or separate stuff sack for wet clothing
Keep valuables simple. Many rafting trips involve shuttles, shared gear areas, and wet landings. Bring only what you need, and ask how personal items will be stored. Some trips allow small dry bags; others ask you to leave phones, wallets, and keys in a secure location.
Medication deserves special attention. If you may need an inhaler, allergy medication, or another essential item, ask the guide how it should be carried and accessed. Do not bury something important in a bag that will be locked in a vehicle miles downstream.
After the trip, dry clothes feel like a small luxury and a major improvement. Even in warm weather, a towel, warm layer, and dry socks can make the ride home much more comfortable.
5. Know what the trip actually feels like from launch to takeout
First-time rafters often picture the whole day as one long rapid. In reality, most trips have a rhythm. There are instructions, calm stretches, bursts of paddling, wet moments, quiet scenery, and a takeout process that may involve carrying gear or waiting for a shuttle.
Here is a typical flow for a guided rafting day:
-
Arrival and check-in
You arrive at the meeting location, sign required forms, meet staff, and get basic instructions. This is also when gear sizes are sorted out. Give yourself enough time so you are not trying to zip a wetsuit, find sunscreen, and listen to safety details all at once.
-
Gear fitting
You receive a PFD and, when needed, a helmet and other gear. The fit should be snug, not decorative. A loose life jacket is not helpful in moving water, no matter how relaxed it looks in parking-lot photos.
-
Safety briefing
The guide explains paddle commands, swimming position, rescue basics, and river behavior. Pay attention even if you are excited or nervous. The briefing is what turns a group of strangers holding paddles into something closer to a team.
-
Launch
The raft enters the water, and the guide helps everyone settle into position. The first few minutes often feel awkward. That is normal. Most people need a little time to learn how to paddle without accidentally tapping a neighbor’s paddle like an amateur percussion section.
-
Warm-up paddling
Before bigger rapids, guides often practice commands on calmer water. This helps the group learn timing. Good paddling is less about strength and more about listening, moving together, and staying balanced.
-
First rapid
The first rapid may feel intense, even if it is beginner-friendly. The boat rises, dips, turns, and splashes. Follow the guide’s commands and keep paddling when told. Many people relax after the first rapid because they finally understand what the motion feels like.
-
Calmer stretches
Between rapids, there may be time to look around, float quietly, hear about the river, or laugh about who got the biggest wave in the face. These quieter sections are part of the trip, not filler. They often become the moments people remember most clearly.
-
Bigger or more technical sections
On some routes, the guide may give more detailed instructions before certain rapids. Listen closely. The group may need to paddle hard, shift weight, or stop paddling at a specific moment.
-
Takeout
At the end, the raft leaves the water at a designated access point. You may help carry paddles or gear, then change clothes and return by shuttle or your own transport plan. Takeout can feel busy, so keep track of your belongings and follow staff instructions.
A good rafting trip is not only about the largest rapid. It is about the build-up, the teamwork, the scenery, and the strange satisfaction of being tired in a good way. The best days often have a balance of splash, focus, and quiet time on the water.
6. Plan the travel details that make the day smoother and more memorable
Rafting has a few logistics that are different from a normal sightseeing stop. Rivers have launch points, takeout points, shuttles, changing areas, wet gear, and timing that may depend on water levels. Plan for those details and the whole day feels easier.
Arrive early. Rafting trips usually need time for check-in, gear fitting, safety briefings, and transport to or from the river. If you are late, you may delay the whole group or miss the trip. Leave extra time for rural roads, parking, restroom stops, and finding the correct meeting point.
Understand the shuttle plan before you go. Some guided trips meet at an office and shuttle guests to the launch. Others meet near the river. Private trips may require setting vehicles at both launch and takeout. If your car keys, dry clothes, or lunch end up in the wrong vehicle, the river will not helpfully circle back.
Plan food and hydration around the trip length. For a short morning run, you may only need breakfast beforehand and lunch afterward. For a longer trip, ask whether food is included, whether you should bring snacks, and how water is handled. Avoid arriving hungry, dehydrated, or overfilled from a heavy meal right before paddling.
Think about the post-trip period too. After rafting, people are often wet, tired, hungry, and very ready for dry socks. Keep towels, warm layers, snacks, and drinks easy to reach. If you have a long drive afterward, give yourself time to change and reset before getting behind the wheel.
Small choices can make the trip feel more memorable without making it complicated:
- Choose a route known for scenery if your group cares as much about views as rapids.
- Ask about photo options or safe camera rules before bringing a phone on the raft.
- Pair a morning trip with a relaxed lunch nearby.
- Stay overnight if the river is far from home and you do not want a long tired drive.
- Plan a simple post-trip stop, such as a viewpoint, short walk, or local meal.
Do not overpack the day. Rafting already brings enough movement, water, and logistics. A simple plan with enough time before and after the river usually beats a packed schedule where everyone is rushing in wet clothes.
Finally, treat the river corridor with care. Pack out trash, follow posted restroom or waste-disposal procedures, respect closures and private property, and keep hats, bottles, wrappers, and small personal items secured so they do not become river litter. Good access etiquette helps protect both the river and future trips.
A safe, memorable rafting adventure starts with matching the river to the people in the boat. Choose the right difficulty, check the conditions, listen to the safety briefing, dress for the water, and leave room in the day for the practical details. Do that, and the trip can feel exciting in the right way: active, shared, and just unpredictable enough to be worth retelling.